pita bread:
whole wheat with sour variant:
- 16 oz whole wheat flour
- 2 oz sour
- 10 oz water
- 0.5 tablespoon Kosher salt
- 1.5 tablespoons honey
“Primitive” Whole Wheat Pita
1. To start the process of making the dough, first put the water, at a lukewarm temperature, in a large bowl. Next put in the sour and stir thoroughly. Add the remaining ingredients and roughly mix the contents of the bowl with a large spoon. Then mix by hand within the bowl until there are no lumps. Dump out the dough onto a work surface and knead briskly until the dough is smooth, shinny, and elastic.
2. Spread a few drops of vegetable oil over the inside of the bowl. Put the dough back in the bowl. Cover the top of the bowl with a plastic wrap. Leave in a warm (85 to 95 degrees Fahrenheit) place until the dough has doubled in volume. In a warm environment this doubling can take as little as four hours depending on the how active the sour is. Whole wheat flour tends to rise quickly. This step is called the bulk fermentation.
3. Pour the risen dough into ten roughly equal pieces for small pitas or six roughly equal pieces for larger pitas on to parchment paper. The parchment paper should be on a peel placed inside a proofing box. Make sure the pitas are flat and do not overlap. They will look like pancakes. Because of the high moisture content (12 ounces of water to 17 ounces of flour which includes the ounce of water and of flour in the sour), or 71% hydration in baker’s math, the consistency of the dough will be between a batter and a regular dough. The purpose of this setup is that the dough is so soft and runny, it would otherwise be hard to move it into an oven. Again, the dough pieces during the second proofing should double in volume. This doubling may take two hours.
4. Preheat your oven to 500 degrees Fahrenheit.
5. Gently slide the parchment paper off of the peel into the oven.
6. Ideally the oven will have a steel pad, or failing that, on an oven stone. Flip them over gently with a spatula after three minutes. They should have puffed up into ball shapes. The baked pita should not have any char (burn marks) or even any real color. After two more minutes on the second side they should be done. Put the baked pita in an airtight container or a cover them with kitchen towels. Baked pita will dry quickly when left exposed to air. The time needed for baking is very sensitive to the actual temperature in your oven. Oven temperature settings are notoriously unreliable because oven manufacturers do not spend much money on their thermometers.
Pita, White or Whole Wheat Flour with Yeast
Pita bread with bread flour and yeast
Ingredients:
10 oz lukewarm water
2 teaspoons yeast
16 oz Bread flour or all-purpose flour
1 and ½ teaspoon Kosher salt
1. In a large bowl mix the flour and the water (lukewarm). Set aside for four hours. This soaking step softens the bran in the whole wheat and gives you a better rise. The soaking of the flour is called “autolyse”. Add the sour and salt and roughly mix the contents of the bowl with a large spoon. Then mix by hand within the bowl until there are no lumps. Dump out the dough onto a work surface and knead briskly until the dough is smooth, shiny, and elastic.
2. Spread a few drops of vegetable oil over the inside of the bowl. Put the dough back in the bowl. Cover the top of the bowl with plastic wrap. Leave in a warm place (ideally 85 to 95 degrees Fahrenheit) until the dough has doubled in volume. This should take about 2 hours. This step is called the bulk fermentation.
3. On a work surface, divide the dough into ten roughly equal pieces for small pitas or six roughly equal pieces for larger pitas. Roll these pieces into tight balls. The pieces have to go immediately into Ziplock bags or a proofing box. Otherwise, they will develop a “skin” (dried surfaces) or cracks on the dough. These will allow air to escape as the pita bakes and so they will not rise enough to create a pocket. Allow these dough pieces to double in volume. This may take an hour or two. This is called the second proofing
4. Preheat your oven to 500 degrees Fahrenheit.
5. Gently roll the balls flat with either your hands or a roller. Dust the bottom of a proofing box with a light coating of flour. Put the flattened dough pieces immediately into a proofing box. Alternatively, set them on a lightly floured surface and cover with plastic wrap to prevent developing a skin. Let them rise a third time for 10-20 minutes.
6. Put the dough pieces in the oven, ideally on an oven steel or oven stone. Since these pitas bake very quickly, for the home baker it is easiest to bake one or two pitas at a time. You can use a peel or a rimless cookie sheet lightly dusted with flour to slide the dough pieces into the oven. Make sure they are flat and do not overlap. Flip them over gently with a spatula after three minutes. They should have puffed up into ball shapes. After two more minutes on the second side they should be done. The baked pita should not have any char (burn marks) or even any real color.Put the baked pita in an airtight container or a cover them with kitchen towels.
Whole Wheat Flour and Yeast Variant:
The variants with yeast and whole wheat flour is made the same as above, but the bulk and second rising will be much quicker, generally half the time as with a sour. The bread flour should give you more rise than the AP flour. Bread flour is widely available in supermarkets. You can also use the high gluten flour that will be distributed in the first class. It will give you the most rise. The additional gluten better captures the steam and carbon dioxide released by fermentation and baking.
Notes:
Whole wheat flour can turn rancid within three weeks of being milled because the oil present in the wheat germ is exposed to air as soon as the kernel is ground. The best way to avoid the rancidity is to grind your own wheat kernels just before using the flour. That requires a grinder and a supply of wheat kernels. If you do buy commercially milled whole wheat, such as the King Arthur or Bob’s Red Mill brands, the best way to avoid rancidity is to store it in your freezer or to use it quickly. King Arthur Whole Wheat Flour has a date of production on top of the bag. It also has a use-by date, which is overly generous. I didn’t see a production date on the Bob’s Red Mill Whole Wheat flour bags.
The time needed for baking any bread is very sensitive to the actual temperature in your oven. Oven temperature settings are notoriously unreliable because oven manufacturers do not spend much money on their thermometers.
You probably notice that all three pita variants – bread flour with yeast, whole wheat flour with yeast and whole wheat flour with sour – are similar. All three have high hydration. That makes the finished pitas soft. The main difference is that the yeast variants take about half the time to rise as the sour variant. Also, the whole wheat will not rise as much as bread flour pitas. The bran is sharp enough to pierce the gluten bubbles and let some of the carbon dioxide escape. If you want a nice pocket it is easier with bread flour.
French bread
Traditional French Bread
- 12 oz Bread Flour
- 4 oz First Clear Flour
- 10 oz water
- 3 teaspoons salt
- 1 teaspoon yeast
- pre-ferment
American style lighter French Bread
- 16 oz AP flour or Bread Flour
- 1 teaspoon yeast
- 10 oz water
- 3 teaspoons Kosher salt
- pre-ferment
1. The pre-ferment consists of a pinch of yeast in the summer or a quarter teaspoon in the winter, 2 oz of lukewarm water and 2 oz of flour (either AP or Bread. This small amount can be mixed by hand. Note, the pre-ferment is not included in the 16 oz of flour, the 1 tsp of yeast, and 10 oz of water in the main dough recipe. Let the pre-ferment rise for 24 hours in warm (80 degree) area.T
2. The final mixing will add the 10 ounces of water, the 16 ounces of bread flour, the tsp of yeast, and the 0.5 Tablespoon of salt to the pre-ferment. Shape the dough into ball.
3. You want to reach a double volume, with the dough covered and kept in a warm place.
4. The third rise comes after the dough is shaped into a loaf and placed in a proofing box. The shaping is much easier to demonstrate than to describe in words.
5. The final proof can also be in a linen lined proofing basket. The linen cloth is called a “Cloche”. This is mostly used with high-hydration doughs. Amazon has five variants from $8 to $26. The cheapest one is cotton, not linen, which will br stickier. Is is also possible to put the shaped dough in an open or a lidded pan. We’ll cover all four ways to do the final proof in class.
6. No matter which container you use, you need to score the dough just for placing it in the oven to prevent cracking. Versions in baking pans will take longer to fully bake. With a lidded pan, the lid has to be off our the bread toward the end of the baking or the bread will not have any color.
7. A typical oven temperature for a loaf would be 350 degrees. Baguette shapes and light textured breads would have higher baking temperatures, such as 450.
8. Depending on the oven, you should pour boiling water into a pan or directly on to the bottom of the oven right after the loaf-shaped dough goes in the oven. French breads usually have a crusty exterior. The baking time for a single loaf of 28 ounces would be around 35 minutes. You should have both a good bottom crust and a good top color and the hollow sound when you thump the bottom. This is the point at which a needle probe thermostat becomes very handy. Once the bread is done it should be placed on wire rack to cool.
Notes
Loaves of bread require a lower baking temperature than the pita bread. A 28 ounce loaf would burn on the outside before the interior was baked if you used the 500 degrees specified for the pita.
French bread is the name in Bob Sandy’s father’s bakery for a crusty white sandwich bread. Many other bakeries used that name. There was nothing particularly French about it. It could just as easily have been called “Italian”. Before commercial breads became soft and tasteless, as in Wonder Bread–a national brand popularized by the Continental Baking Company, unsliced “French” bread was the most prominent store-bought bread.
This French bread uses yeast instead of a sour. The yeast cuts the proofing times in half. We will have three proofing steps, and use steam in baking. The shaping will be covered in class.
Obviously, this French bread will not have a sour taste. To enhance the yeasty taste we will use a pre-ferment. In class we will use a stand mixer to make the dough quicker. The pre-ferment is similar to a sour, except that it won’t have a bacteria that give sours their sour taste. That means there won’t be any lactic or citric acid.
The finished dough with the amounts in the ingredients list will weigh about 28 ounces. The final weight of the baked bread depends on the shape (a long thin baguette shape loses the most water while a round shape loses the least). It also depends on how crusty the bread is. Using steam will result in a crustier bread and less water loss in the baking and cooling after baking. Lastly, the container used for baking affects the water loss. A loaf baked on a steel will lose the most water. A loaf baked in a lidded pan will lose the least. A loaf baked in an open topped pan will be between these. Some dense breads, such as rye and pumpernickel, lose less water weight. Lastly, large loaves lose less water weight as a percentage than small loaves.
Commercial bakeries need to meet a target weight for their finished loaves, so that their labelled weights meet legal standards. Home bakers do not have these concerns. A good guess for the water weigh loss would be 20% for oblong shaped loaves baked on a steel surface. That would take our original 28 ounce dough down to 22.4 ounces. Our trial loaf came in at 25 ounces. That is a good size for a loaf. A large loaf would be 32 ounces at the baked-and-cooled weight.
The above dough used to make “French” bread can be formed into a baguette shape. The word “baguette” in French means “stick”. Bakeries in France used to exclusively make large round loaves, called a Miche, which means “loaf” in French. A baked miche can weight between 2.2 and 11 pounds. They have thick crusts and a dense, moist crumb, so they can keep for days. In contrast, a baguette dries out after four to eight hours. As families became smaller, starting in the 1920s, bakers figured out they could do better selling smaller loaves than the miche. An intermediate size between the baguette and the niche also became popular. It is called a “bâtard”, which means bastard in French. That term is due to it being neither a miche nor a baguette. The stick shaped baguette bread bakes way faster, which saved oven time.
Parisian bakeries compete every year for the honor of being judged the best bread in the city. The winning bakery gets a four thousand Euro prize, but the additional business from winning is the real payoff. The winner also gets to provide daily bread to the residence of the President of France at the Elyseé Palace. To get more flavor in their breads the competitors stretch out the pre-ferment and proofing process for six days by retarding (slowing down the rise) in a fridge, and making second and third pre-ferments incorporating the previous pre-ferment. Since we aren’t in business and will not be supplying the Elyseé Palace, one pre-ferment will be enough.
The government of France has a tendency to regulate everything. In the case of baguettes there law listing the allowed ingredients. Anything not on the list would prevent the product from being called a “baguette”. There are also strict size and weight rules. The details are in the Wikipedia entry for “baguette”.
We will cover the shaping of baguettes in class. It is hard to slide a proofed baguette into an oven on a peel without bending the stick. The solution is a long narrow board that will be demonstrated in class. Keeping the sticks both straight and separate requires a special linen cloth, which will also be demonstrated.
Sour dough bread
Rustic variant:
- 8 oz high gluten flour
- 8 oz first clear flour
- 2 oz sour
- 10 oz water
- 0.5 tablespoon Kosher salt
White Bread variant:
- 16 oz AP flour or Bread flour
- 2 oz sour
- 10 water
- 0.5 tablespoon Kosher salt
Whole Wheat variant:
- 16 oz whole wheat flour
- 2 oz sour
- 10 water
- 0.5 tablespoon Kosher salt
- 1.5 tablespoons of honey
1. Mix all of the ingredients either by hand or in a stand mixer.
2. The bulk proofing usually takes four hours, twice as long as with yeast as the leavening agent. The time is required is depends on how active your sour is. Across the three variants the White Bread would, other things equal, have the most rise and the Whole Wheat variant the least. The tiny particles of bran in whole wheat flour prick some of the gluten bubbles.
3. After the dough has doubled in size divide it into loaf sized amounts (not necessary if you are have not scaled up the standard 16 ounce recipe.
4. Shape the dough into a round or oblong loaf. How to shape the dough without losing too much gas will be covered in class. If you are trying for an open crumb then the best method for the final proof is to use a banneton (a wicker bread basket) lined with linen and dusted with rice flour. Bread flour can be used for dusting if you do not have rice flour, but rice flour is more effective at preventing sticking. For a sandwich style loaf with a tighter crumb an open baking pan can be used for the final proof. Putting a sheet of parchment paper in the open topped baking pan will keep the dough from sticking to the pan. What does not work with this sourdough recipe is putting the shaped dough into a proofing box. The dough does not have enough cohesion because of the high moisture content and the acids in the sour dissolving some of the gluten. A dough placed in a proofing box will just spread out.
5. The final proof can be brief, from 30 minutes to an hour, depending on how active you sour is.
6. The options for baking are a dutch oven or an open pan. The dutch oven should be left in the oven while it preheats. Glently flip the banneton over so that the dough lands on a sheet of parchment paper. Score the dough just before placing the dutch oven with the dough or the baking pan with the dough into the oven which has heated to 450 degrees. You do not need steam if you are using a dutch oven. With an open topped baking pan you do need steam to get a decent crust. The oven temperature without a dutch oven is 400 degrees.
7. Bake for 20 minutes, remove the lid of the dutch oven, lower the oven temperature to 400 and bake for 10 more minutes. The internal temperature of the bread should be 200 degrees. For the pan version, just lower the temperature after 20 minutes.
8. Take the baked loaves out of the dutch oven or the baking pan and place them on a rack to cool.
The ingredients above will give you loaves with either a tight crumb or a open crumb, depending on which container you use and on the activity of your sour. The “crumb” refers to the texture of the interior. A tight (AKA) smooth crumb is best for sandwiches. The opposite of a smooth crumb is an open crumb, with lots of holes. An open crumb would not work well for some sandwiches, such as peanut butter and jelly. The peanut butter and jelly would leak out of the holes. Some people like to make a sour dough bread with an open crumb. There are entire books on how to get an open crumb in a sour dough bread:

The motivations for making open crumb breads appears to include the aesthetics and the challenge. The author of the above book, Addie Roberts, also claims that open-crumb loaves are more digestible. That appears to me to be nonsense. Really dense bread is hard to digest but airy crumbs, as pictured above, are no easier to digest than regular-crumb breads with lots of smaller holes. Making an open-crumb sourdough bread was not covered the first two times this course was offered. What changed for this third offering was an experience I had at the farmer’s market in Lippitt Park in Providence. When I shopped there in the summer I was amazed to find that a half dozen booths selling sourdough bread. All of them had open crumbs, albeit nothing near the airiness in above photo. Even more amazing to me was that some of them were able to charge $15 for a loaf. When I expressed this amazement to my daughter, she said she. prefers the open-crumb style to my sourdough bread. To please my daughter, I have been experimenting with open-crumb sourdough breads. It is not easy, but after seven iterations she approved my sourdough bread’s taste and lightness.
I bought Roberts’ book to learn her secrets. There are many: letting the flour soak in water for hours to soften and absorb more water (called autolyse); increasing the amount of water while holding the other ingredients constant (called a high hydration dough); gentle hand mixing; lifting and folding the dough many times during the proofing; being very gentle while shaping the dough to retain as much carbon dioxide gas as possible; using some of the fourteen specific flours that she found yield good results. Her most time consuming secret is an every four-hour-feeding schedule for sours kept at 75 degrees. Maintaining a sour at that schedule is like having a new born baby that needs feeding at midnight, four AM, and again at eight AM, who never grows up. Addie Roberts lives in Florida, which makes it easier to keep her house at 75 degrees year round. She also checks the acidity of her sour with ph meter and has tricks to lower the acidity when the meter reading is too high. If “holey” bread is your grail, buy the book. It costs $25. Roberts also offers a two-hour one-on-one training session on making open-crumb for $150.
Kaiser and other rolls with egg-based doughs
- 16 oz Bread flour
- 2 eggs yolks
- 1 teaspoon yeast
- 8 oz water
- 0.5 tablespoon Kosher salt
- 1 oz unsalted butter or vegetable oil
1. In terms of the baking process, all of the ingredients are combined in a stand mixer. The mixing should be at a relatively slow speed for ten minutes. The finished dough should be smooth and shiny.
2. The proofing time for the volume to double will be shorter than for French bread described above because the egg yolks and butter (or vegetable oil) give the fermentation a boost.
3. After the bulk proofing, the dough should be scaled in 4.5 ounces pieces. Our standard one pound of flour yields enough dough for 6 kaiser rolls at this scaling,
4. Round the pieces by hand.
5. Put these pieces into a proof box for a half hour.
6. The next step is the hand-shaping (klopping) process, which will be covered in class. A verbal description would be useless. Greenstein, writing long before YouTube videos were invented, does try to explain it with words and pen-and-ink drawings. It is pretty hard to follow.
7. Next spread poppy seeds over the bottom of the proofing box. Place the formed pieces top side down over the poppy seeds. Leave room for the rolls to expand. Let them proof up to double their size, about an hour.
8. Preheat your oven to 425.
9. Place the rolls, top side up, on a sheet pan that has been lightly oiled. The kaisers rolls won’t be quite as crusty as on a steel, but the handling will be much easier.
10. You will need steam, either, depending on your oven, from pouring boiling water into a pan that was in the oven while preheating, or directly on to the bottom of your oven.
11. The rolls are done when they have a light brown color. Depending on our oven, you may have to experiment if the bottom of the rolls have too much color before the tops are done. One solution to too much bottom color is to put the baking rack near the top of the oven. Another solution, if your oven has this setting, is to bake part of the time on the convection setting.
Notes:
Amazon sells several stamps to create the curved indentations in a kaiser roll. The cheapest is Ateco Kaiser Cutter, at $9. There are photos submitted by users of finished rolls on the Amazon website that look pathetic. Shaping them by hand is not hard to learn.
Challah
- 16 oz AP flour or Bread Flour
- 4 egg yolks
- 1 teaspoon yeast
- 8 oz water
- 2 teaspoons Kosher salt
- 2 oz vegetable oil
- 2 oz sugar
1. You will also need an egg in addition to the ones required in the dough for an egg wash. The egg wash is a beaten egg that is brushed onto the exterior of the proofed loaf just before it goes into the oven. A single egg is sufficient to wash two or three loaves.
2. The ingredients list has either AP flour or bread flour. With the dinner rolls that are meant to be soft, the AP is fine. For the challah the bread flour would give you more rise and firmer product. I prefer using the bread flour, but if you want a softer challah, use the AP. Commercial challahs are less rich and softer than this challah. Our intent here is to make a substantial bread.
3. The bulk proofing is the same as for the kaiser rolls and dinner rolls. The amount of dough made from the ingredients list is enough for one large challah.
4. After the bulk proofing, divide the dough into three equal parts. Round each piece for a short second proofing. If the dough sticks to you hands when rounding then dust the dough with flour and dust your hands. The dough will be soft compared to the other doughs in this class.
5. Because of the rich dough with sugar, this second proofing can be short, about fifteen minutes, depending on how warm your room is or if your oven has a proof setting. The exact proofing times for the bulk and second proof also depends on the liveliness of your yeast.
6. The rolling out into tapered strips will be demonstrated in class.
7. The next step is braiding the three strips. This step will also be demonstrated in class. A three braid challah is simple. We will also demonstrate a six braid challah. The final proofing is also short, 15 minutes at a room temperature of 70 degrees.
8. The baking will be without steam. Bake at 350 degrees. The dough will be placed on baking sheets. We will use both color and internal temperature, 200 to 210, to judge when the challahs are ready.
Notes
The dough for challah is similar to dough for kaiser and dinner rolls. It has more egg yolks. It also has sugar and vegetable oil. If you don’t keep kosher you can substitute butter for the vegetable oil. The extra eggs and the sugar and vegetable oil (or butter) make the dough richer.
Dinner rolls
1. Use the same dough as for Kaiser rolls
2. The rolls are scaled at 2 ounces. The standard one pound of flour recipe would yield 14 dinner rolls.
3. The proofing and seeding is the same as with the kaiser rolls. The final shaping will be covered in class. We will demonstrate shaping round, figure eight, twisted, croissant, and oblong shapes. Just before baking wash the tops of the rolls with a beaten egg and sprinkle different seeds/toppings on rolls by shape. We will use pretzel salt, and caraway, sesame, and poppy seeds.
4. They do not require steam as dinner rolls are usually meant to be soft. Bake a 350.
5. Also, the baking time is less because the rolls are smaller. Aim for a light golden color. The lighter color is further reason for the shorter baking time.
Notes
Bob Sandy’s father’s bakery was mainly a wholesale bakery that sold products to independent drivers who, in turn, sold to restaurants and groceries. Over a hundred bakery trucks would visit at set times from around 2:00 AM to 8:00 AM. They pre-ordered and expected to have everything waiting for them at their arrival time. Dinner rolls were its most popular item. They were served in fancy restaurants all over southeast Michigan. We called them “assorted rolls” because they came in four different shapes in a bag of a dozen rolls.
Rye Bread
- 2 oz sour
- 6 oz medium rye flour
- 10 oz first clear flour
- 1 teaspoon yeast
- 1 tablespoon Kosher salt
- 2 tablespoons vital wheat gluten
- 10 oz water
1. The dough using the ingredients listed will be fairly stiff. The stand mixture has to set on a low speed. Again, run the mixer until the dough is a smooth, shiny, and forms a tight ball.
2. Doughs with rye flour will be sticky. You will need to put vegetable oil around the dough before putting it in the proof box.
3. The bulk proofing is faster with the rye flour than with a pure wheat flour. It can be as little as two hours if the proofing is in an oven with a proof setting. Again, the listed ingredients will yield one medium loaf.
4. By the way, if you want to have a seeded rye bread, add caraway seeds to the dough. Some people hate the taste of caraway seeds and others love it. Add the caraway seeds according to your tastes.
5. After the bulk fermentation you need to take the dough out and work it into a ball for a second proofing. Again, the dough should double in size during the second proofing.
We will cover the shaping in the class. It will be similar to the shaping of the sour dough and French breads.
6. The oven needs be pre-heated to 350 degrees.
7. The bottom of the proof box has to covered with corn meal for the final proofing.
8. The bread has to be scored just before going into the oven.
9. The shaped and fully proofed dough can be placed in an oven with a dusted peel or a by hand. Don’t forget to score the dough just before it goes in the oven.
10. You must have steam in the oven. Because the dough is dense, the baking will take longer than with the challah and the French breads.
Notes
Jewish style rye breads are meant to hold up to sandwich meat, such as corned beef or pastrami. Soft breads won’t hold up. Rye breads need to have at least 25% rye flour to 75% first clear flour to have a decent rye taste. The ingredient list we put together has 37.5% rye flour. We have tried 50% rye flour. That bread had a grayish color, but lots of rye taste. Another difference between the rye bread and the previous breads is the use of both a sour and yeast. Doughs made with rye are more acidic than pure wheat flours. Pure rye flours have a pH of around 4.2, which is comparable to canned tomato juice. That high acidity is why cans of tomato juice have linings that resist acids. Using a sour that is even more acidic than the dough actually improves the rye bread by preventing the finished bread from being gummy. The chemistry of how this works is complicated. If you are curious here is a link:
Interestingly, any acid can help. Bob learned to use honey, which is also more acidic than the rye dough, in a class taught by Stanley Ginsberg, the author of a book on how to bake with rye flour. Going with a really low ratio of rye flour can avoid the need for an acid, but the resulting bread won’t taste like a rye bread.
Bob has tried using just the sour, but never got enough rise without also using yeast. David Kaplan, who co-coordinated the second offering of this course, has been able to do it, but the process took days. The bakeries Bob worked in always used both a sour and yeast. Lastly, another difference between the rye bread ingredients and the previous breads is the additional of vital wheat gluten. It helps with the rise when you have a high fraction of rye flour.
Pumpernickel Bread
- 2 oz sour
- 6 oz medium rye flour
- 10 first clear flour
- 1 teaspoon yeast
- 1 tablespoon salt
- 2 tablespoons vital wheat gluten
- 4 oz dark caramel
- 3 oz altus (remove crust from old rye bread, soak in water overnight in a fridge and squeeze out the water)
- 8 oz water
1. The instructions for mixing, proofing, and scoring, and baking pumpernickel are the same as for rye bread, except for the additional ingredients of burned sugar and alte.
Notes
Pumpernickel bread is even denser than the rye bread. The word “alte” means old as in the yiddish phrase “alte cocker”. It is the stale rye bread that has the crust removed and then soaked with water and kept overnight in a fridge and then squeezed to remove most of the water. The alte makes the bread more dense. The burned sugar adds a little bitterness, which is characteristic of pumpernickel. There are crazy substitutes for the burned sugar suggested on various YouTube videos on how to allegedly make pumpernickel. Don’t use molasses or coffee grounds! The former makes the bread sweet and the latter makes it taste like coffee. One common variant is to add raisins. The amount would be to your taste. A less common, but very traditional ingredient is charnushka, a seed with an interesting taste. Here is a link about that seed:
https://www.seriouseats.com/spice-hunting-charnushka-nigella-onion-seed
When the bakery in Worcester, Widoffs, (where my father got his first bakery job in the United States) closed in 2015, Russ and Daughters hired some of the former Widoffs bakers from Worcester to make Jewish style breads in a new bakery in Brooklyn, exclusively for their lower East Side store and restaurant. They make a charnushka pumpernickel.
Bagels
- 16 oz high gluten flour
- 2 oz malted barley syrup
- 8 oz water
- 2 oz sour
- 1 teaspoon yeast
- 1 tablespoon salt
- 7 grams food grade lye
1. The traditional boiling water included food grade lye. Its concentration is 0.15% of the weight of the water. A quart of water weighs 946 grams. A pot that safely holds six quarts of water would have 6 times 946, or 5,876 grams. The amount of food grade lye needed would be 0.15% of that, or 9 grams if your scale was accurate to a gram. The first time I tried to make bagels with food grade lye, I was off by an order of magnitude, 1.5% food grade lye instead of 0.15%. I wound up with pretzels that looked like bagels.
2. Scale bagels at 5 ounces.
3. One absolutely crucial factor is obtaining a good bagel is to make sure that they have proofed enough so that when you put them in the boiling solution they float. Try one bagel as a test and if it sinks to the bottom, let the remaining bagels proof some more. What happens when the bagels sink to the bottom of the pot is that they will stick to the bottom and eventually puff up enough to float. Parts of the stuck bagels will tear off and cling to the bottom. That creates an opening for the boiling liquid to get inside the bagel. The result is a soggy bagel.
4. After the bagels are boiled for about a thirty seconds on each side, they need to be scooped out quickly and, while wearing rubber gloves, dipped in bowls of whatever seeds you prefer from: everything mix (which I will cover how to make in class), sesame, poppy seed, or salt. I put seeds on the top and bottom. Here I am breaking with tradition. Bagels used to be seeded on only the top. I just like more seeds.
5. As soon as the bagels are seeded, they are ready for the oven. I use parchment paper over the baking steel because it makes it easier to clean the seeds that fall off the bagels. Set your oven to 400 degrees, with twenty minutes on one side and then 15 minutes on the other. Take one bagel out and cut it in half to check if they are fully baked before taking all of the bagels out. By the way, there is no need to have steam in the oven. The boiling is sufficient to get a chewy crust.
Notes
Bagels will be our most complicated product. They are very chewy on the outside, or at least real ones are. That is why you need the high gluten flour. To achieve that chewy exterior, the bagels have to be boiled.
While you should certainly would avoid skin contact at even the very dilute 0.15% concentration of the boiling liquid with lye, it is dilute enough to just require rubber gloves for handling the boiled bagels. The pot for the boiling has to be stainless steel because the lye solution will react with aluminum or enamel pots. Some YouTube videos suggest using just salt or just malted barley syrup in the boiling solution. You will not get the same color or shine from either salt or malted barley syrup.
I discussed the issues with bagel doughs burning up KitchenAid bowl-lift mixers in the section on equipment. There is no reason to belabor that issue here. Bagels do not need a bulk fermentation. The malted barely syrup in the dough speeds up the fermentation. Some recipes call for sugar. Montreal bagels use honey. I prefer the taste of the malted barley syrup in the dough. I also use a sour for taste. I haven’t had any luck with relying solely on the sour for leavening. The dough is too heavy. Most commercial bakeries use a different method to get a strong yeasty taste in their bagels. They retard the formed bagel dough pieces by keeping them for 24 hours in a fridge. Few homes have the necessary empty fridge space. The bagel bakeries have big fridges into which they can roll racks and racks of formed bagels. The best I can do in winter is use our unheated room to hold a few dozen bagels. Between using a small amount of sour versus using the cold sun room, I prefer the taste with the sour.
Bob Sandy recently visited Montreal, which has its own style of bagels. The main difference for these famous bagel shops is the use of honey in the boiling liquid. They do make a big deal out of using their original wood-fired ovens, but that does not create a smokey taste in the bagels. The first and still the most famous bagel shop is named after the street it is on, St. Viateur. Bob had a tour of this bakery and had a chance to examine their bags of flour. It was Ardent Mills Keynote brand, which has 13% protein. Bob uses the King Arthur Sir Lancelot brand (14.2%). Small differences in the protein content make a big difference in the how chewy the bagel is. A protein content of 13% is closer to King Arthur’s bread flour, at 12.7%, than to a high gluten flour.
Another difference between the course’s bagel recipe and the almost all commercial bakery bagel recipes is a softer dough, from both lower protein content in the flour and from adding more water. Stiff doughs cannot be shaped into bagels by machine. Oddly, even bakeries that do shape their bagels by hand, such as Saint Viateur, are making bagels with softer doughs. The machine made bagels run the gamut from a little soft, such as Saint Viateur’s, to very soft, such as those sold by Whole Foods, to as soft as Wonder Bread, such as Linder’s bagels. Lastly, almost all commercial bagel bakeries use dough conditioners. A bakery based in the Detroit area, New York Bagels, advertises that its only ingredients are flour, water, yeast, and malt barely syrup. Bob recommends them. The dough conditioners help the finished bagels retain moisture. That gives them a longer shelf life. Other chemicals in dough conditioners soften the dough to make it more easily worked by machine. If you are curious about the chemicals in dough conditioners see:
Bob just freezes the bagels he will not eat within a few hours of baking.
Five ounces is much smaller than most bagels from bagel shops in Providence, such as Providence Bagels and the former Rebelle Bagels. Bagels used to be much smaller in the 1960s. Back then they were all hand-formed. I will cover how to form the bagels in class.
One final bit of bagel trivia. The holes in the bagels are not there so that bagels can be stacked on a stick. The bagels bake faster with a hole in the middle. You can try baking a few without a hole and will see that by the time the interior of the bagel with no hole is fully baked the exterior will be as hard as a brick.
Körözött
Körözött is a traditional Hungarian toping for pumpernickel bread. The recipe below is quick and simple. In a food processor combine:
1. one package of Narragansett Creamery Salty Sea Feta, cut into chunks
2. one package of Kraft Cream Cheese, cut into chunks
3. Three (3) Tablespoons of Paprika
4. 1 teaspoon of yellow mustard
5. a half cup of sour cream
6. one small onion roughly chopped
Run the food processor until the ingredients are all smooth. Some recipes call for caraway seeds. If you are putting the Körözöt on rye bread that has caraway seeds, then you already have that flavor. If not, a Tablespoon of caraway seeds can be added to the food processor before the mixing. Ideally, the caraway seeds should be ground fine in a coffee mill type of grinder, but you can use whole caraway seeds.
Recipes for the Austro-Hungarian Strudels, Pastries, and Tortes Course:
Apple Strudel: from Austrian Desserts by Toni Mörwald and Christopher Wagner
Ingredients:
Strudel dough:
1 lb bread flour
3 Tablespoons oil
1.5 teaspoons salt
8 oz water
Apple filling:
- 3 ½ pounds of apples
- 4 ¼ Tablespoons butter
- 3.5 ounces unsalted butter
- 3.5 ounces bread crumbs
- ½ Cup sugar
- 2 ounces golden raisins
- Pinch of ground cinnamon
- 4 teaspoons vanilla sugar (sugar that has been mixed with insides of vanilla beans in the ratio of 1 Cup of sugar to 1 vanilla bean)
- Zest of 1 lemon
- 7 Tablespoons dark rum
- 7 Tablespoons melted butter
- Confectioner’s sugar for dusting
Directions:
- Mix dough ingredients either by hand or in a stand mixer until smooth. Place dough in a bowl spread some oil over the dough to prevent a skin from forming. Let rest for an hour with a cover over the bowl.
2. Lay the dough on a cloth that has been dusted with flour and use a roller to flatten.
3. Place your hands palm down between the dough and the cloth, spread out your fingers, and gently and slowly stretch the dough out.
4. As soon as the dough is paper thin press out any bumps and thick edges
5. Preheat oven to 375
6. Heat the 4 1/4 ounces of butter in a pan and lightly brown half of the breadcrumbs.
7. Peel and core apples and then cut into thin slices.
8. Hydrate the golden raisins in a bowl of water.
9. Place the apples and raisins in a bowl with the browned bread crumbs, the remaining bread crumbs, sugar, vanilla sugar, lemon zest, and rum.
10. Saturate the spread-out dough with the 3.5 ounces of melted butter.
11. Spread the filling over the dough.
12. Use the cloth to roll the dough around the filling into a log shape.
13. Place the strudel seam side down on a buttered baking sheet and brush the exterior of the strudel with some of melted butter. Trim off edges and seal them tight.
14. Bake for 40 minutes
15. Dust with confectioner’s sugar
16. Serve in slices while still warm
Notes:
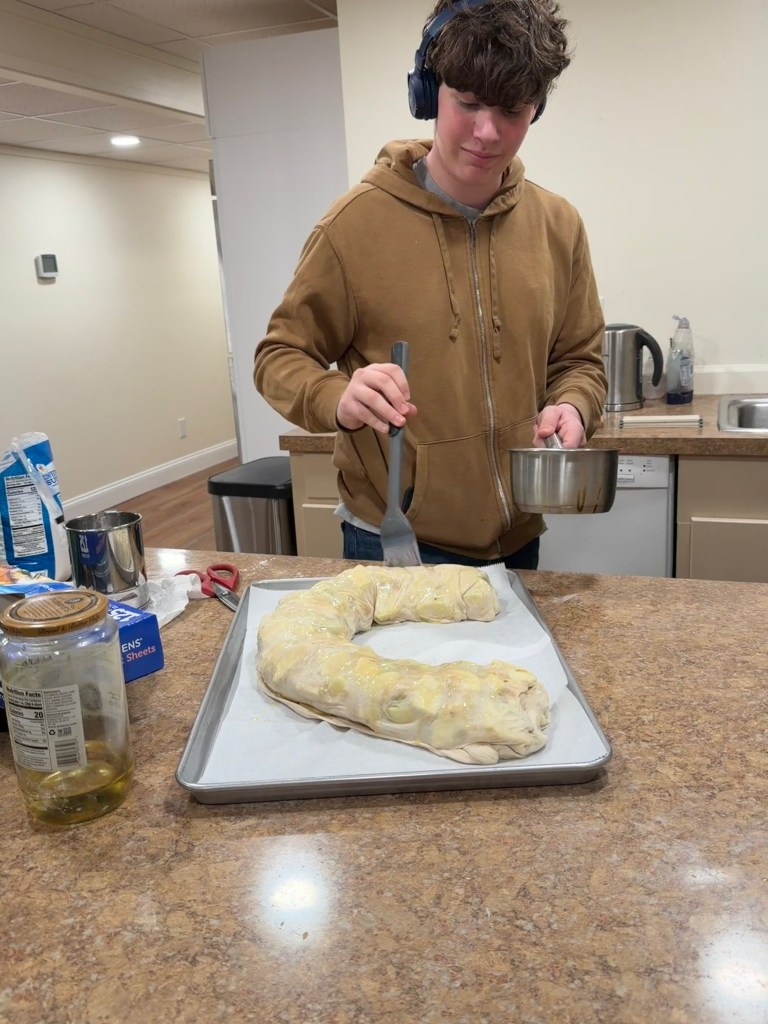
I have based all of the recipes that use flour at one pound flour. That works fine for most breads and rolls, but it makes a lot of apple strudel. Below is a photo of my grandson spreading melted butter on the top of the strudel before it is baked. Since the strudel is best just out of the oven, if you do not have a lot of guests or neighbors who would like some, cut the recipe in half or a quarter.
Some alternative sweet fillings for a strudel are pear, apricot, fresh cheese (strained Greek yogurt), and a mix of chopped walnuts and raisins. There are also savory fillings for strudels. These range from hearty combinations of ground meat, bacon, and potatoes to vegetarian options such as mushroom, leek, and feta, or braised cabbage. Common bases include seasoned ricotta, mozzarella, or cream cheese combined with roasted vegetables, sauteed greens, or breakfast sausage. My mother made the braised cabbage version. It tasted way better than it sounds.
The big hurdle in making strudels is getting the dough as thin as paper without tearing. It takes patience and practice. Some of the photos of home-made apple strudels on the web have doughs that appear to be an eight of an inch thick. That gives the strudel a chewy texture. Some of the recipes call for phyllo dough or puff pastry dough. Neither of those work-arounds duplicate the thinness and mouthfeel of the hand-spread dough. Phyllo dough dries out very quickly, so baklava recipes call for drenching the baklava in honey. That doesn’t work for strudel.
For a video of me and my grandson stretching the strudel dough, paste in the following link into a browser: https://www.youtube.com/shorts/isQElcvtLHg
The internet is full of advice on how to get the strudel dough thin enough. All the sources say to rest the dough after mixing. The recommended duration is at least an hour, as in the recipe above, which is from the Mörwald and Wagner book. These authors are professional pastry chefs in Vienna. King Arthur’s recipe calls for 24 hours of resting the dough in a fridge and letting it come back to room temperature. Another book I bought to prep for this course, The Classic Art of Viennese Pastry (see the books section of this website) call for hand mixing and slapping the dough down hard on a wood board 500 times and kneading it after each set of hundred slaps. The 500 slaps and the hand mixing takes a crazy amount of time.
Other recipes call for adding a little lemon juice to the dough. In the Jewish Style Breads course the classes learned that acids in a dough weaken the gluten. An example is a sourdough bread that is over proofed not rising because the bacteria in the sour produce acids that attack the gluten. However, a slightly weaker gluten matrix makes the dough easier to spread. One of my books said that you need to make strudels ten times before you can get a properly thin strudel dough. The take-away is that experience helps. I think the long time it takes to prep the dough is why strudels were mostly home made in Austria and Hungary. It would cost too much labor and tie up all the bench space in a commercial pastry/torte bakery. That they are way better served just after coming out of the oven is another reason that strudels were primarily home baked.
Most recipes do not specify which types of apples to use. As with apple pies, really sweet apples would make a cloyingly sweet apple strudel and the apples would turn to mush while baking. Granny Smith, Honey Crisp, or Braeburn were recommended for strudels on Google AI.
Linzer Torte Recipe: adapted from Austrian Desserts
Ingredients:
2 sticks plus 1 1/2 Tablespoons unsalted butter
9 ounces confectioner’s sugar
pinch of salt
2 teaspoons vanilla sugar
zest of one lemon
5 eggs
1 egg yolk
9 ounces of ground hazel nuts
12.5 ounces of sponge cake crumbs
4.5 ounces of AP flour
3 Tablespoons of rum
1 Teaspoon of ground cloves
1 Teaspoon of ground cinnamon
7 ounces of red current marmalade
Almond slices
Directions:
1. Preheat oven to 320 degrees
2. Cream the butter (just below room temperature) with the confectioner’s sugar, salt, vanilla sugar, and lemon zest
3. Mix in the eggs and the egg yolk one at a time
4. Mix hazelnuts, cake crumbs, and flour in a bowl and then pour into the eggs and butter
5. Add the rum, ground cloves, and cinnamon
6. Put a 12-inch spring form pan on a baking sheet and pour in one half of the batter
8. Brush the red current marmalade over the batter
9. Fill a piping bag with the remaining batter fitted with a star-shaped tip. The piping bag should only be filled half way up so you can seal the top of the bag. That when you squeeze the batter only comes out of the tip.
10. Pipe a lattice of lines of batter across the top of the cake. The lattice will expand as it bakes, so make the lines thin to allow the red current marmalade to show through the spaces between the lines
11. Sprinkle slices of almonds over the top of the cake
12. Bake for approximately an hour in a pan set on the steel at the bottom of the oven
Notes:
The temperature of butter is critical. Cold butter won’t mix, but room-temperature butter will separate from the batter. Take the butter out of the fridge a half hour before using it. The ingredients have to be mixed quickly and evenly. A stand mixer with a whip attachment makes this easier. Over mixing can cause the batter to form into crumbs. If that happens add a few drops of milk and mix again. Put the dough in the fridge after mixing so that it firms up. Poke holes with a fork in the dough before baking so that it will rise better in the oven. Be sure to keep the oven at 320. A hotter oven can ruin the torte.
Three things went wrong with my first attempt making the above recipe. The lattice of batter spread out during the baking and completely covered the top of the torte. The fix is to make the rows and columns of the lattice thinner. The second thing that went wrong is that the bottom layer of batter baked less than the top layer. The fix for that is to have more bottom heat. I had put the torte on baking pan in the middle of the oven. Placing the pan with the torte on the steel at the bottom rack of the oven would give more bottom heat. The third thing was that the torte was too high. Linzer tortes are supposedly to be about an inch and half high. The torte is very rich and has a strong flavor. A two-and-a-half inch high torte is too intense. The recipe just said to use a spring form pan, without specifying the size. I used a-ten inch pan. A twelve-inch spring form pan would have 44% more area and yield a torte with about the right height. If you do not own that large a spring form pan, or you do not need that large a torte, you will have to reduce the recipe to work with the pan you have.
Speaking of intense flavor, Linzer tortes are traditionally served with whipped cream. That cuts the intensity. Of course, most cakes taste better with whipped cream.
Linzer torte is the first of four tortes in this course. The others are Sacher, Chestnut, and Dobos. According to Wikipedia a torte is:
“A torte (/ˈtɔːrt/;[1] from German: Torte (German pronunciation: [ˈtɔrtə]), in turn from Latin via Italian: torta) is a rich, usually multilayered, cake that is filled with whipped cream, buttercreams, mousses, jams, or fruit.[2]
Tortes are commonly baked in a springform pan. Sponge cake is a common base, but a torte’s cake layers may instead be made with little to no flour, using ingredients such as ground nuts or breadcrumbs. Ordinarily, the cooled torte is glazed and garnished.”
Linzer Torte goes back to at least the 1600s. It gets its name from Austrian city of Linz because the local bakers specialized in it. However, it appears to have originated in Verona, Italy. Supposedly, a recipe from 1653 is not only the earliest recipe for Linzertotre, but the earliest recipe for any torte. The lattice top is traditional. So is the red current jam. Originally, there was no flour in the recipe. Ground hazelnuts were used instead. Most recipes do have some flour. Some recipes use other jams than red current, such as raspberry. The other jams do not have the tartness of red currents. In the 1950s we had red current bushes in an our backyard. Red currents have a short shelf life after being pulled off. That is why you cannot find them in grocery stores. Ideally, you would make the red current filling from fresh red currents, as my mother did, but that meant you could only make recipes calling for red currents during the short season when they are ripe. My mother also had a problem of me and my sister eating them before she could use them in recipes.
I found a web source for red current jam that is made in Poland.
https://westheimer.phoeniciafoods.com/
Bob’s Red Mill makes a hazelnut flour that has good reviews on Google. The reviews warn to check the expiration date. The oil in nuts can become rancid when exposed to air. Hazelnut flour is just finely ground hazel nuts. To make my first Linzer Torte I just ground the nine ounces of hazel nuts in a food processor. You have to be careful to not create hazel nut butter instead of a flour. The trick is to use the pulse setting and stop the processor before the flour congeals into a paste.
Poppy seed rolls:
recipe from Elegant Hungarian Tortes and Home Made Desserts
Ingredients:
Dough:
8 ounces unsalted butter
1 lb unbleached AP flour
0.5 teaspoons yeast
1/8 cup lukewarm milk
2 medium eggs at room temperature
¼ cup sour cream
¼ cup lukewarm milk
1.5 Tablespoons sugar
1 teaspoon salt
Egg wash:
Yolks of two medium eggs
½ Tablespoon of water
Garnish:
Confectioner’s sugar
Ingredients for the Filling:
1.5 cups milk
¾ cup granulated sugar
1 lb poppy seeds
Finely grated zest of 2 medium lemons
½ cup golden raisins
Directions for the filling:
1. Grind the poppy seeds fine in a coffee grinder
2. Bring the milk and sugar to a boil in saucepan. Stir in ground poppy seeds and cook for 10 minutes over low heat, stirring constantly. Let cool. Stir in lemon zest
Directions for the Poppy Seed Roll:
1. Mix butter and flour in a large bowl with a pastry blender or your hands until it resembles bread crumbs
2. Dissolve the yeast in a ¼ cup of lukewarm milk in a small bowl.
3. In a 2-cup glass measuring cup lightly whisk together the eggs, sour cream, 1/8 cup lukewarm milk, sugar, and salt. If short of 2 cups add milk to reach 2 cups. Stir in the dissolved yeast
4. Add the yeast mixture to the butter/flour mixture. Knead well by hand. Cover and let rise for 2 hours.
5. From the dough into two equal-size balls. Flatten each ball a little into a disk.
6. Preheat oven to 350
7. Butter one 11 by 17 inch rimmed baking sheet, line it with parchment paper.
8. In a small bowl whisk together the egg yolks and water for the wash
9. Lightly flour a work surface. Roll out one of the two disks into a 9 by 12-inch rectangle. Spread one-half of the filling evenly on the dough. Starting with the long side of the dough, roll it into a log, like a jelly roll. Pinch the ends closed. Repeat with the second dough
10. Place both poppy seed rolls on the prepared baking pan. Immediately brush the tops with the egg wash. Allow roll to rest for 20 minutes
11. Bake in the middle of the oven for 30 minutes. Aim for a deep golden brown. If that color is not reached in 30 minutes, lower the oven temperature to 325 and continue baking until the color is deep golden brown. Cool on a wire rack.
12. Sift confectioner’s sugar over the top of each roll
13. Cut cross wise to serve
Notes:
Poppy seed rolls were my mother’s go-to dessert. In Hungarian they are called “Makos Beigli”. There is little resemblance between the canned Solo-brand poppy seed filing and the home-made filling. Here is what Google AI came up with when asked to compare the two.
“Homemade poppy seed filling offers superior, customizable flavor and texture compared to the convenience of Solo brand. Homemade allows for a richer, less-sweet profile with better texture, while Solo provides a consistent, ready-to-use option, though some find it overly sweet or thin. Many bakers prefer homemade for traditional recipes”
Unlike the strudel, they do keep a while. They are also a lot easier than the strudel. The recipe above must go way back because the soaking of the yeast isn’t necessary or useful for instant yeast, which has been the norm for decades. Like the strudels, poppy seed rolls were primarily a home made dessert in Austria and Hungary.
The main alternative filling to poppy seeds is chopped walnuts and raisins.
Raspberry Danish:
Ingredients:
Dough:
- 16 oz AP flour Flour
- 4 egg yolks
- 1 teaspoon yeast
- 8 oz water
- 2 teaspoons Kosher salt
- 2 ounces sugar
- 4 ounces unsalted butter, room temperature
Filling:
16 ounces frozen raspberries
5 Tablespoons sugar
Juice of one lemon
2 Tablespoons corn starch
2 Tablespoons water
4 ounces of cream cheese (optional)
Sugar Glaze:
4.5 ounces of powdered sugar
2 ounces of cream
1/4th of vanilla bean
Directions:
Filling:
1. Put the raspberries, sugar, and lemon juice in a pot on the stove.
2. Simmer this mixture until it has the texture of puree
If you are worried about serving the danish to someone who can’t digest raspberry seeds, run the puree through a fine sieve.
Dough:
1. Put all of the ingredients in a stand mixer, except the butter, and mix until it forms a smooth ball.
2. Place the dough in bowl covered with cling wrap.
3. Let the dough rise in a warm place until it doubles.
4. Flatten the dough with a roller until it is a rectangle half-an-inch thick.
5. Spread thin pats of butter over the dough.
6. Fold the dough into smaller and smaller rectangles three or four times.
7. Roll out the dough into a rectangle that is a quarter of an inch thick.
8. Cut the large rectangle of dough into 8 to 12 rectangles using a knife.
9. Place one-eight or one-twelfth of the raspberry filling in the center of each rectangle.
10. (Optional) Slice the cream cheese into 8 or 12 pieces and place a slices of cream cheese on top of the raspberry filling.
11. Fold the four edges of each filled rectangle toward the center. You can entirely cover the filling or leave some showing in the middle. Pinch the folds together tightly so that the danish does not come apart as it bakes.
12. Place the danish on a baking sheet that has been buttered and covered in parchment paper. If any of the filling leaks the danish would stick to a bare pan.
13. Let the danish rest for twenty minutes
13. Place the baking sheet in the middle rack, not on the steel, into a 350 degree oven. Remove when they are golden brown.
14. Transfer the danish to a baking pan with rack. Let them cool for ten minutes. While they are cooling, slowly pour the cream into the powdered sugar and scraped inside of the 1/4 vanilla bean, whisking while pouring. Then drizzle the glaze in lines across the top of each pastry.
Notes:
The reason I included a danish in this course is that they were made in my Dad’s bakery. Obviously, they are neither Austrian nor Hungarian. Also, they are more a breakfast or lunch food than a dinner dessert. Anyway, they are easy to make and taste great. Because they were easy, the bakers would let a lowly apprentice, like me, make them. I would roll out the rich dough, made with eggs and butter and sugar, on a large work bench. The spread-out dough would cover an entire work bench, around five feet by twelve. We used a big roller to do it quickly.
My recipe uses butter, but in the bakery we also used hydrogenated vegetable shortening, such as Crisco, because it was easier to handle and cheaper. Both butter and shortening make the pastry flakey, but the butter tastes better. There are commercial raspberry fillings, such as by Solo, but home-made is easy and tastes way better. In the bakery we did not put cream cheese in the center of the danish, but almost all recipes on web include cream cheese. Adding it makes the danish richer and more filling.
For a home made filling I prefer frozen raspberries. That avoids having to pick out leaves and any moldy raspberries. You can use fresh if you can’t find frozen.
Chocolate Babka: from Food52 Website
Ingredients:
Dough:
- 4 cup all-purpose flour, plus more as needed
- 1/2 cup superfine sugar
- 2 teaspoon instant yeast
- 3 large eggs
- 1/2 cup water
- 1 teaspoon salt
- 2/3 cup unsalted butter, softened
Filling:
- 2/3 cup Nutella
- 2 cup crumbled plain sesame halvah
- Syrup
- 1/3 cup water
- 6 tablespoon granulated sugar
Directions:
1. For the dough, add the flour, sugar, and yeast to a stand mixer fitted with the dough hook and mix on low speed for 1 minute.
2. Add the eggs and water and mix on low speed for a few seconds, then increase the speed to medium and mix for 3 minutes, until the dough comes together.
3. Add the salt and then start adding the butter, a few cubes at a time, mixing until it is incorporated into the dough.
4. Continue mixing for about 10 minutes on medium speed, until the dough is completely smooth, elastic, and shiny. During the mixing, you will need to scrape down the sides of the bowl a few times and add a small amount of flour onto the sides so that all of the dough doesn’t stick too much.
5. Transfer the dough to a large, lightly greased bowl.
6. Cover with plastic wrap and refrigerate overnight.
7. Grease two 9- by 4-inch loaf pans with butter and line the bottom of each with a piece of parchment paper.
8. Divide the dough in half and keep one half covered in the fridge.
9. On a lightly floured surface, roll out the dough into a rectangle measuring about 15- by 11-inches.
10. Trim the sides to make them more or less even. Use an offset spatula to spread half the Nutella on the dough, leaving a 3⁄4-inch border all around.
11. Sprinkle half of the halvah over the top.
12. Brush a little bit of water along the long end farthest away from you.
13. Use both hands to roll up the dough.
14. Press the dampened end to seal.
15. Transfer the dough to a sheet pan, seam side down, and freeze for 15 minutes to make the next step a bit easier.
16. Repeat the rolling, filling, and re-rolling process with the other half of the dough and filling.
17. Working with one roll at a time, use a serrated knife to trim about 1/2 inch off both ends of the roll. Then use the knife to gently saw the roll into half lengthwise.
18. With the cut sides facing up, gently pinch one end of each half together, and then lift the right half over the left half.
19. Repeat this process, but this time lift the left half over the right so that you’re making a twist. Try to keep the cut sides facing outward.
20. When you get to the end, gently squeeze the two halves together.
21. Carefully lift the cake into one of the prepared loaf pans.
22. Cover the pan with a damp tea towel and leave it to rise in a warm place for 1 to 1 1⁄2 hours. The loaf will rise and get puffy, but it will not double in size.
23. Repeat the process to make the second loaf.
24. Preheat the oven to 375° F.
25. Remove the tea towels, place the cakes on the middle rack of the oven, and bake for 30 to 40 minutes, until a skewer inserted in the center comes out clean.
26. While the cakes are in the oven, make the syrup. Combine the water and sugar in a saucepan, place it over medium heat, and bring the mixture to a boil. Cook until the sugar dissolves, then remove the pan from the heat.
27. As soon as the cakes come out of the oven, brush them liberally with the syrup. Use all of it.
Notes:
Babka is a tradition Eastern European dessert often made with left over dough for challah. Challah dough has a little sugar and oil, but it is not meant to be a dessert. Until recently, babka was a much drier and much less sweet dessert. Then a few New York bakeries experimented with making it sweeter and putting in lots of chocolate. They also drenched their babka in a sweet syrup. Babka went from a ho-hum dessert to a phenomenon. Now it is widely sold. It is almost as popular as sourdough bread became after the pandemic. That recent popularity is why I included it in the course. It was never made by mother, my Dad’s bakery, or the other bakeries I worked in. Back then it was a strictly home-made dessert.
Locally, Navad Bakery sells a good babka. From New York City, I am partial to the Russ and Daughter’s babka. The recipe above uses Nutella, which gives you a mix of chocolate and hazelnut flavors. It is both decadent and fairly easy. If you want an intense chocolate taste, drop the halvah and substitute a good quality chocolate for the Nutella.
Sacher torte:
Ingredients:
Cake:
4.6 ounces dark couverture chocolate (min. 55% cocoa content)
1 vanilla bean
3.5 ounces icing sugar
5.3 ounces of softened butter
3.5 ounces icing sugar
6 eggs
3.5 ounces raw cane sugar, golden brown
5 ounces AP flour
Fat and Flour for the Springform:
7 ounces apricot jam
7 ounces raw cane sugar, golden brown
5.3 ounces ounces dark couverture chocolate (min. 55% cocoa content)
Unsweetened whipped cream to garnish
Directions:
1. Preheat oven to 338°F. Line the base of a springform with baking paper, grease the sides, and dust with a little flour.
Melt couverture over boiling water. Let cool slightly.
2. Slit vanilla pod lengthwise and scrape out seeds. Using a hand mixer with whisks, beat the softened butter with the icing sugar and vanilla seeds until bubbles appear.
3. Separate the eggs. Whisk the egg yolks into the butter mixture one by one. Now gradually add melted couverture chocolate. Beat the egg whites with the castor sugar until stiff, then place on top of the butter and chocolate mixture. Sift the flour over the mixture, then fold in the flour and beaten egg whites.
4. Transfer the mixture to the springform, smooth the top, and bake in the oven (middle rack) for 10–15 minutes, leaving the oven door a finger’s width ajar. Then close the oven and bake for approximately 50 minutes. (The cake is done when it yields slightly to the touch.)
5. Remove the cake from the oven and loosen the sides of the springform. Carefully tip the cake onto a cake rack lined with baking paper and let cool for approximately 20 minutes. Then pull off the baking paper, turn the cake over, and leave on rack to cool completely.
6. Cut the cake in half horizontally. Warm the jam and stir until smooth. Brush the top of both cake halves with the jam and place one on top of the other. Brush the sides with the jam as well.
7. To make the glaze, put the castor sugar into a saucepan with 4.23 ounces of water and boil over high heat for approximately 5 minutes. Take the sugar syrup off the stove and leave to cool a little. Coarsely chop the couverture, gradually adding it to the syrup, and stir until it forms a thick liquid (see tip below).
Tip: HOW TO TEST WHETHER THE GLAZE HAS THE RIGHT CONSISTENCY
Let a little of the glaze run over a wooden cooking spoon. It should now be covered by a layer of glaze approximately 4 mm thick. If the glaze is too thick, add a few drops of sugar syrup to dilute it (to do so, loosen any remaining sugar in the saucepan with a little hot water). Make sure the glaze does not get too hot, or it will be dull when cooked and not glossy.
8. Pour all the lukewarm glaze liquid at once over the top of the cake and quickly spread using a palette knife. Leave the glaze to set for a few hours. Serve garnished with whipped cream.
Notes:
Sacher torte has an origin story from 1832. The famous Austrian diplomat, Prince Klemens Wenzel von Metternich, tasked his kitchen staff to prepare a banquet. Given the attention to desserts in Vienna, the Prince asked for a new dessert that would impress his guests. The head pastry chef was sick that day. The task fell to the 16 year old apprentice pastry chef, Franz Sacher. The Prince added a little pressure when he told the apprentice, “I hope you won’t disgrace me tonight”.
The Sacher Hotel rather immodestly calls the Sacher torte “the world’s most famous cake”. The original recipe, unlike that of the original Dobos Torte (see below), is still a secret. It has even been the subject of a nine year legal battle (1954-1963), as both the Sacher Hotel and the Café Demel claimed that they were serving the original version. The two versions differed on how many layers of jam to include and whether to use butter or margarine. Both companies claimed a direct connection to the son of the torte’s originator, Eduard Sacher, who founded Hotel Sacher. Before he founded this hotel in 1876, he worked as an apprentice at the Café Demel, where he refined his father’s Sacher torte recipe. The lawsuit was settled out-of-court. That agreement let the Sacher Hotel advertise its version as the original while Café Demel had the right to claim its is the Eduard Sacher version. Both are still on sale in Vienna, but the Sacher Hotel torte outsells the Café Demel torte five-to-one.
The recipe above comes from the Sacher Hotel website. It says “THIS IS ONLY AN APPROXIMATION OF THE ORIGINAL RECIPE, WHICH OF COURSE MUST REMAIN A TIGHTLY-KEPT SECRET”. (caps in the original). That is why I thought it would be fun to taste the original against their approximation recipe.
The Sacher Hotel recipe calls for dark couverture chocolate with at least 55% cocoa content. The reason that a high fat content chocolate is required is that you pour the melted chocolate over the entire assembled cake. It has to flow evenly and leave a glistening smooth finish. A Google search yields a half dozen sources for this type of chocolate. The easiest source is Amazon, which has Cocoläat 55% Dark Couverture Chocolate Chips at $84.99 for a five pound bag. That would be enough for 8 Sacher tortes at 10 ounces each. Making 21 Sacher tortes in class would require 3 five pound bags.
Chestnut torte From Elegant Hungarian Tortes:
Ingredients:
Cake Layers:
10 large egg whites, at room temperature
1 teaspoon of cold water
Pinch of salt
3/4 Cup of granulated sugar
1/4 Cup AP flour
1/2 Cup of finely ground walnuts (made from 1 3/4 ounces of walnuts
Filling:
7 ounces of semi-sweet chocolate
2 sticks of unsalted butter at room temperature
2 tablespoons of confectioner’s sugar
1/4 Cup of dark rum
1/4 of a vanilla bean
20 ounces of chestnut puree
Garnish:
2 Cups heavy whipping cream
1/4 Cup of confectioner’s sugar
Directions:
Cake Layers:
Preheat oven to 375° F
1. For a rectangular cake line an 11 by 17 inch baking pan with parchment paper and butter the paper and the sides of the pan. Sprinkle with flour and shake off the excess. For a round cake use the bottom of spring form pans instead of the baking pans, also with parchment paper, buttered and dusted with flour.
2. In the bowl of a stand mixer fitted with a whisk attachment beat the egg whites, water, and salt until soft peaks form. Continue to beat, gradually adding the sugar, until stiff peaks form that are still glossy, not dry. Whisk together the AP flour and the ground walnuts in a bowl, then gently fold in the flour/walnut mixture into the egg whites.
3. Spread the batter evenly in the prepared baking pan. Bake on the middle rack of the oven at 375° F for 12 to 15 minutes, until the top is firm and golden-brown. Let the cake cool in the pan set on a wire rack.
Filling:
4. Place the chocolate and the 2 Tablespoons of water in the top of a double boiler pan and set aside. Bring the water in the double boiler to a boil, then turn off the heat and place the top half of the double boiler over the hot water. Stir until the chocolate is melted, then remove the top pan and set aside, letting the chocolate cool to room temperature.
5. Beat the butter and sugar together very well in a large mixing bowl, then slowly add the rum, and the scrapings from the inside of the vanilla bean. Beat until the mixture is light and fluffy. Stir in the melted chocolate, and when the ingredients are well mixed, stir in the chestnut puree, mixing well until well incorporated.
Assembly:
6. The book’s recipe suggests cutting the cake layers into strips to make a rectangular cake, but all of the photos in the book show the finished cake as a round. The rectangular is easier. If you want to do a round torte, use three bottoms of spring form pans of the same diameter. Either way you need at least three cake layers.
7. Cover each of the three layers with one-fourth of the chocolate chestnut filling. Stack them on your serving platter and then cover the top and sides of the torte with the remaining filling. Refrigerate for a few hours before serving.
Garnish:
8. Chill a large mixing bowl and the mixer whisk attachment in the freezer. Whip the cream to soft peaks in the chilled bowl, gradually adding confectioner’s sugar. Beat until stiff peaks form.
9. Cover the sides of the torte with whipped cream. Using a star tip on a pastry bag filled with whipped cream, pipe a border around the top and bottom of the edges of the torte. Then use a plain tip to write the word “Chestnut” on the top. Makes between 10 and 16 servings.
Notes:
One of my favorite treats growing up was a home-made chestnut puree dipped in melted dark chocolate. My mother made it when chestnuts were in season. In the US chestnuts are associated with savory dishes, such as roasted whole chestnuts (I love them too) or chestnut stuffing for a roast turkey. However, chestnuts can be the basis of superb sweets. This torte has the same flavor profile as the candy my mother made, reflecting the chestnuts, chocolate, sugar, cream, and rum they have in common. The author of the book in which I found this recipe, Ella Kovács Szabo, said that when she growing up in Hungary her mother made this torte for Christmas.
Fresh chestnuts are only available in the late Fall. You can find them in groceries in time for Thanksgiving. The class meeting for the chestnut torte is scheduled for October 27. Maybe fresh ones will be available by then. Failing that, Trader Joe carries peeled and cooked organic chestnuts, but they typically arrive around the 1st of November. That leaves just canned or frozen sources. The Swiss brand, Hero, sells canned chestnut puree. It is 65% chestnuts, but it has ascorbic acid and flavoring. Bakers Authority has purer frozen puree at $38.14 ($62.37 with shipping) for 2.2 pounds. It has 50% chestnuts. I would need 7 cans to have enough for 21 tortes for the class. Picking it up in New York City could save $200 on the shipping. Because of the higher quality and the cost savings, I hope I can find a source for fresh chestnuts in time for the class.
Dobos Torte:
Ingredients:
Chocolate Buttercream:
2-inch section of a vanilla bean (I have tried both a vanilla bean and pure vanilla extract. The bean tastes better)
¾ C of powdered sugar
6 oz of unsalted butter, softened slowly to room temperature
3 T of strong espresso
1 egg
3 oz of semi-sweet chocolate (Whole Foods on Main Street carries Valrhona Chocolate for baking. It is really good.)
Sponge layers:
5 extra-large eggs separated
Pinch of salt
½ cup of granulated sugar
1/3 cup of granulated sugar
½ cup of cake flour
4 ounces of unsalted butter melted
½ a C of chopped nuts (unsalted), either almonds, hazelnuts, or walnuts
Directions:
Chocolate Buttercream:
1. split the vanilla bean section lengthwise and scrap out the contents into the powdered sugar
2. mix the sugar, butter, espresso, and the egg with a whisk in a stand mixer (this would take ages done by hand). The mixture should be smooth.
3. melt the chocolate in the top of a double boiler and pour into the sugar/butter/espresso/egg until fully incorporated.
4. refrigerate for 15 minutes before using.
Sponge layers:
1. Preheat oven to 375 degrees Fahrenheit. Whip the eggs whites with 1 T of ice water and the pinch of salt until stiff.
2. Add the egg yolks one at a time, beating for a full minute after each egg.
3. Add the ½ cup of sugar a spoon at a time while continuing the beating. (Note, this step is much easier using a stand mixer with a whisk attachment set to the lowest speed). Add the cake flour
4. using a silicone pad as a baking surface on a baking pad, butter it generously on one side and pour the egg batter on top. Spread with a spatula to even it out. Make circles larger than 9 inches because the outer edge will be trimmed to get a circular shape and because the edges may be too crisp. Aim for a quarter inch thick.
5. Bake in the oven until golden brown. It will take about ten minutes. The torte requires six sponge layers.
6. Cover the finished layers with wax paper to retain moisture.
7. Make the chocolate filling (see above).
8. Set aside the best-looking layer to use under the caramel glaze. Spread melted butter on a granite countertop or a marble slab. Put the chosen layer on the buttered surface.
9. Spread the chocolate buttercream using an icing spatula until 1/8 inch thick one layer at a time, and then stack the layers. Frost the sides of the stacked torte with the chocolate buttercream. While the chocolate buttercream is still soft, push chopped up nuts into the chocolate buttercream on the sides of the torte until they are covered. Pour the remaining chocolate buttercream into a pastry bag with a number six tip.
10. Melt the 1/3 C sugar in a stainless steel sauté pan (it is hard to tell the color of the caramel with a non-stick pan). Stir the sugar as it melts with a flat-tipped wooden spoon. As soon as the color of the sugar is golden brown (be careful, the sugar can turn black very quickly and set off your smoke alarm) spoon the caramel onto the chosen layer. Before it hardens, use a buttered knife to score the caramel all the way through so that the cake pieces can be cut without cracking up the caramel. The caramel will harden in less than a minute. If you are making a big sheet of Dobos Torte you will need help with this scoring to finish before it hardens, especially if you want many small pieces.
11. When the top layer is cool place it on top of the rest of the cake. Pipe a decorative circle of the chocolate buttercream around the top edge of the torte.
12. Cool the cake in a refrigerator for at least 3 hours. The caramel top will prevent the torte from drying out in the fridge. Keep the cake in the fridge until it is ready to serve as the chocolate buttercream will melt if it gets too warm.
13. Use a wet knife to cut the cake.
Notes:
What is Dobos Torte? Quoting Wikipedia “. . . a Hungarian sponge cake layered with chocolate buttercream and topped with caramel.[1] The layered pastry is named after its inventor, Hungarian chef József C. Dobos, a delicatessen owner in Budapest.[2] In the late 1800s, he decided to create a cake that would last longer than other pastries in an age when cooling techniques were limited. The round sides of the cake are coated with ground hazelnuts, chestnuts, walnuts, or almonds, and the hardened caramel top helps to prevent drying out, for a longer shelf life.[1][3]a Dobos torte was first introduced at the National General Exhibition of Budapest in 1885; Emperor Franz Joseph I and Empress Elisabeth were among the first to taste it. The cake soon became popular throughout Europe, both for its durability through shipping and for its unique appearance. With its flat, shiny, caramel glazed top, it was simple but elegant, as opposed to the more intricate cakes of the age.[1]
József C. Dobos became wealthy from selling his name sake torte all over Europe, shipping them by train. Even though his original was widely available, there were many counterfeits, often bearing little resemblance to the original. Dobos was so aggravated by the copy cats that he publicly released his secret recipe. That pinned down exactly what was original. The original had the hard caramel layer flat across the top. If you Google images of Dobos Torte you find that dubious versions still abound. It is easier to place decorative caramel wedges at angles across the top than to get a flat caramel cover over the top sponge layer and score it before it hardens. The decorative wedges do not seal in the moisture. They also change the taste of the torte as the flat top becomes part of every bite of the torte while the wedges have to be cut while eating the cake and combined with a piece of the base.
József C. Dobos was so patriotic that when World War I broke out he put his entire fortune into Hungarian war bonds. When the war ended the bonds were worthless. He died penniless in 1924. Hungarians still appreciate his torte, if not his patriotism. On the 75th anniversary of the torte’s invention in 1962 a two-meter high cake was created and carried through Budapest in a celebratory parade. In 2025 the Dobos C. József Vocational School of the Budapest Center of Economic Vocational Training set a Guinness record by creating a 112-meter cake Dobos Torte. The two-meter high version from 1962 was probably the practical limit for height. The 112-meter version was horizontal.
I first made Dobos Torte for my mother’s 90th birthday party. That was 2003. I knew it would please her. It is the hardest of the 8 products in this course. Before I started to make it I consulted one of my mother’s top baking friends. She had made it herself, but warned me that it would not be easy. I guess I like challenges. In addition to its inherent difficulties, I had figure out how to scale the recipe from serving a dozen people to one hundred. Some aspects were not easy to scale. The hard caramel topping has to be scored while it is still warm to be able to cut the torte. That is easy for one cake meant to serve 12 people. For Temple Beth-El’s World Series of Dessert contest I had to scale the recipe up to 250 servings. To score the topping on even one sheet pan I had to have several helpers working simultaneously to finish before it hardened. Another scaling issue is how to make larger sheet of the cake layer. Baking the sponge layers in big sheets results in crisp, wafer-like texture near the edges before the center is finished baking. The sponge layers are supposed to be soft, The sponge has very little cake flour, a just half cup for an entire 9-inch torte. All of the lift in the sponge comes from beaten egg whites. This torte is meant for lovers of chocolate, butter, and sugar. It has just enough of the sponge to hold the chocolate buttercream in place.
My solution to the scaling problem relies on the magic of silicone. I could bake pan-sized sponge layers on silicone baking mats. Even though the edges all hardened, I could trim off the dry parts and still have a good sponge.
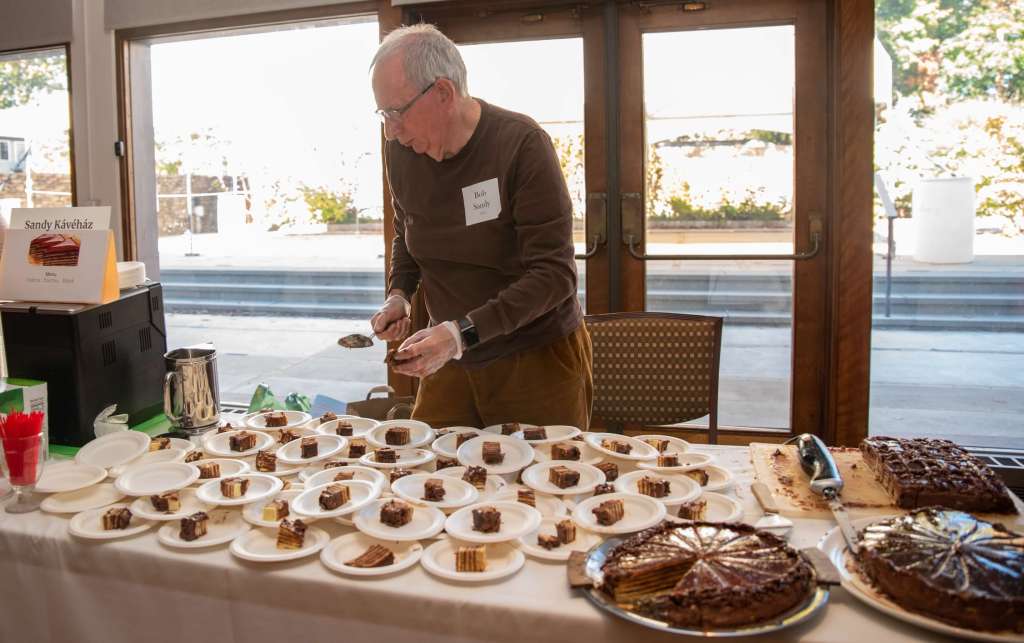
The photo of above is of me setting up a massive display of slices of Dobos Torte for the 2022 Temple Beth-El World Series of Jewish Desserts. I brought along my espresso machine to serve espressos with the cake, hence the sign “Sandy Kávéház”. That is Hungarian for Sandy Coffee House.
The recipe above is for the original small torte. If you are serving a crowd just multiply the ingredients by five or so and buy lots of silicone baking mats. Incidentally, the word “dobos” means drum in Hungarian. The round version of this torte looks like a drum.
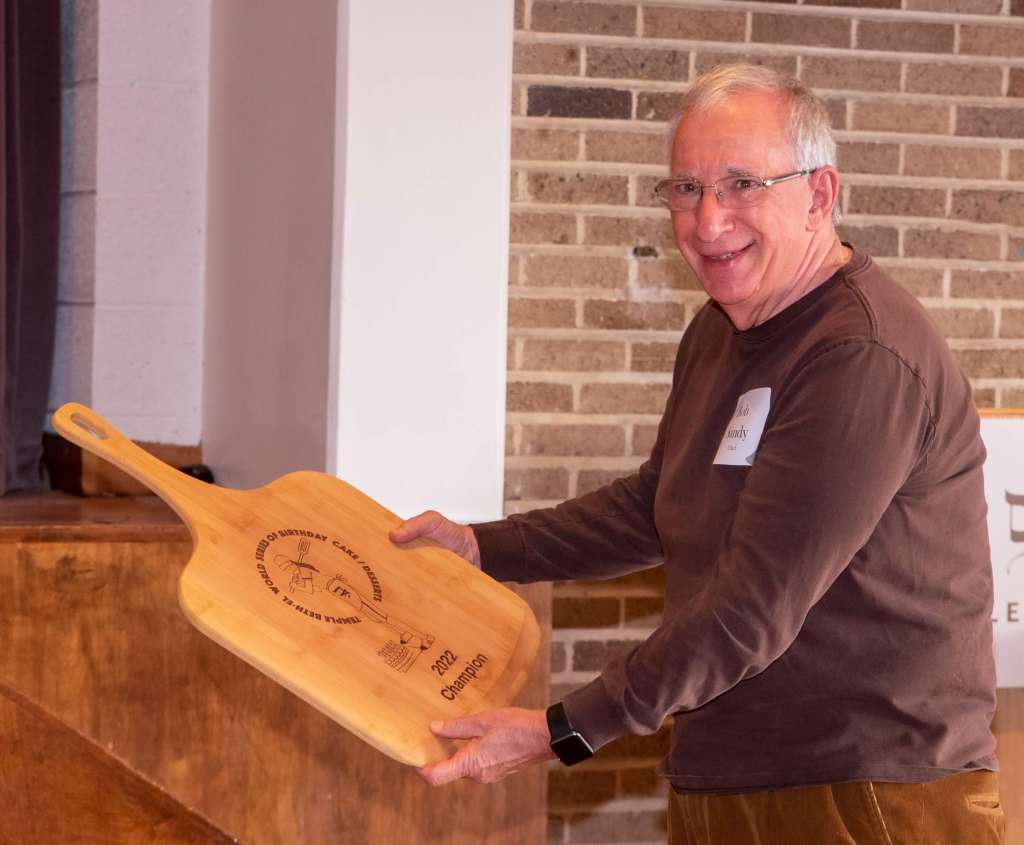
The judges, three professional chefs, gave me first place. The photo shows the trophy in the form of a baking peel.
